| Available Bearings | Bearing Selector | Technical Info | New Products | |||
MicroTorque™ Ball Bearings Torque Testing || Dynaroll
TECHNICAL PAPERS
Inch Precision
Metric Precision
600 Series
6000 Series
6200 Series
6300 Series
6800 Series
6900 Series
R Series
Thrust Bearings
Stainless Steel Thrust Bearings
Thin Section Bearings
Collar Bearings
Flangette Collar Bearings
Specify by Type
Specify by Desired Dimensions
Specify by Cross-Reference
Specify by Known Part Number
Part Numbering System
TECHNICAL PAPERS
PRINCIPLES OF MicroTorque™ BALL BEARINGS TORQUE TESTING
|
By Simon Harrison, Ph.D. |
||
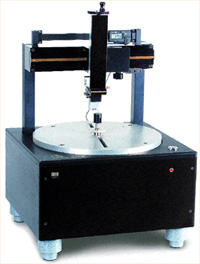 MicroTorque
testing is a deceptively simple method to accurately determine the
“quality” of a rotating part. A source of accurate,
slow, vibration-free rotation is applied to one component of a rotating
part while measuring the force exerted by the opposite component.
The essence of the test is that it is performed at very low speeds,
typically 2 RPM, but in some cases as low as 0.001 RPM. At these
very low speeds, there is no vibration to mask the very small changes
in transmitted force that are caused by microscopic internal inconsistencies
during rotation. When such a rotation system is coupled to a sensitive
force-measuring load cell, the system can detect the smallest variations
caused by bearing brinelling, contamination, raceway misalignment,
lobing and many other issues. Results are graphically displayed
on an easy-to-read trace. MicroTorque
testing is a deceptively simple method to accurately determine the
“quality” of a rotating part. A source of accurate,
slow, vibration-free rotation is applied to one component of a rotating
part while measuring the force exerted by the opposite component.
The essence of the test is that it is performed at very low speeds,
typically 2 RPM, but in some cases as low as 0.001 RPM. At these
very low speeds, there is no vibration to mask the very small changes
in transmitted force that are caused by microscopic internal inconsistencies
during rotation. When such a rotation system is coupled to a sensitive
force-measuring load cell, the system can detect the smallest variations
caused by bearing brinelling, contamination, raceway misalignment,
lobing and many other issues. Results are graphically displayed
on an easy-to-read trace.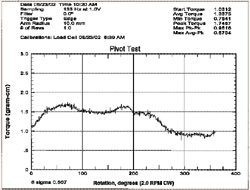 The purpose of this article is to introduce
the reader to the concept of MicroTorque testing and to present
some analytical results from tests on parts with different rotational
problems. All measurements were taken using an M15W MicroTorque™
tester from Measurement Research, Inc. 
Normal Test Trace Normal test – A “normal” test, like beauty, is in the eye of the beholder. The M15 is a very sensitive device and a perfectly made part may show many small variations during rotation. The important thing is to decide what is important to the application. The test shown here is typical of a disk drive pivot, showing even rotation over 360°. Small irregularities and the grease hash do not indicate any problems. In a typical ball bearing the inner race must rotate 3-4 complete revolutions relative to the outer race before the balls have moved around the raceways once. This means that consecutive 360° tests of the same part actually have different starting positions for the balls, causing apparent torque variation.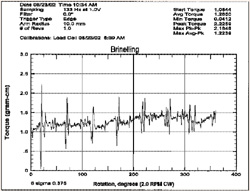
Brinelling Test Trace
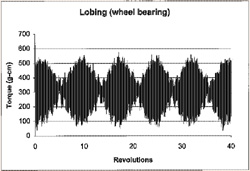
Conclusion The MicroTorque tester is a versatile
and powerful tool that can be used to pinpoint a number of rotational
faults. The traces shown in this article show simple effects,
but further analysis of test data, including frequency domain,
can expose great detail of the internal structure of any rotating
part. |

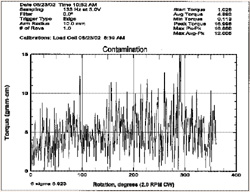 Contamination
Test Trace
 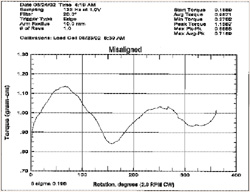 Misalignment
Test Trace
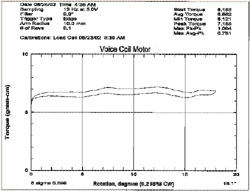 VCM Test Trace